

Organize Smarter, Rank Higher, Keep Visitors Happy
Let’s face it — nobody likes a messy blog. Especially not your readers. When someone lands on your site, they want to find what they’re looking for fast. Categories help make that possible.
They don’t just improve user experience — they help with SEO too. Search engines love well-structured content. Grouping your blog posts under clear, focused categories makes your entire site easier to crawl and more relevant in search results.
So let’s get your blog organized, shall we?
Why Blog Categories Matter
Before we dive in, here’s a quick snapshot of what blog categories can do:
- Help visitors quickly find content they care about
- Signal topic relevance to search engines
- Make your site feel cleaner and more professional
- Keep similar posts grouped together for binge-worthy browsing
If you want people to stay on your store’s blog, categories are a must.
How to Add a New Blog Category?
Creating categories in Magefan Blog is quick and painless.
Step 1: Open the Blog App
In your Shopify admin, go to Apps > Magefan Blog. Once you’re in the Blog App dashboard, click on Categories in the left-hand menu.
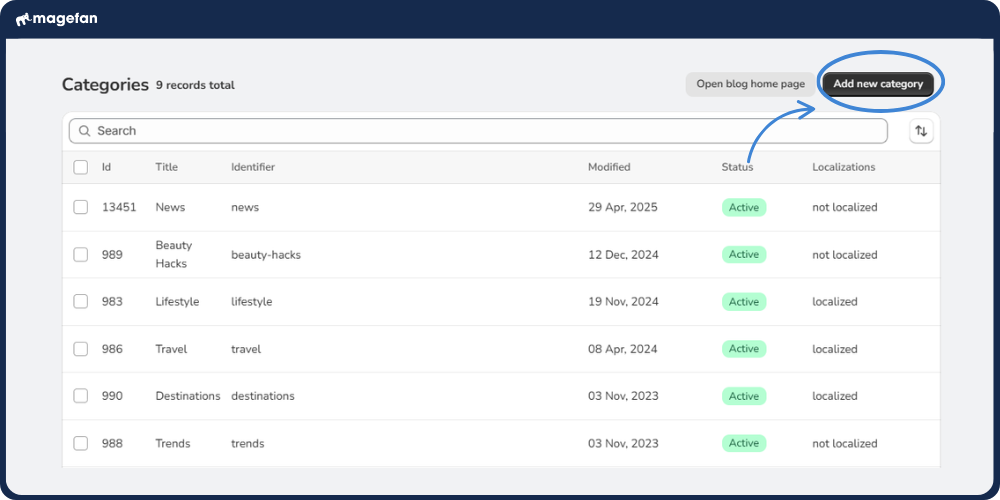
This opens the new category form, where you can define all the important details for your category.
Step 2: Name Your Category and Add a Description
Here’s what to add:
- Title: Keep it short and clear. For example, “Recipes,” “Tips,” or “Behind the Scenes.”
- Content: Add a description that will be displayed at the top of your category.
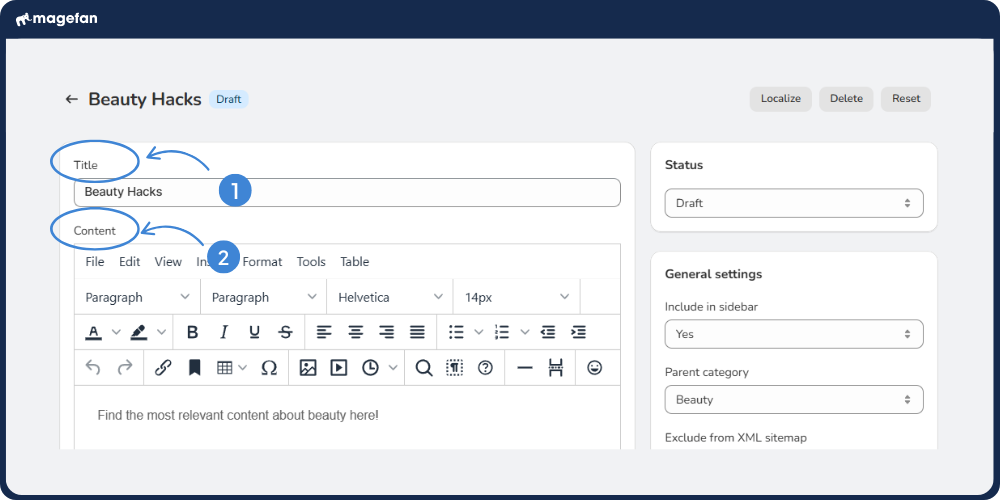
Step 2: Fill in the General Details
- Include in Menu (1): Enable this option if you want the category to appear in your blog's navigation menu or sidebar.
- Parent Category (2): Want to create subcategories? Select a parent category here. If this is a top-level category, simply leave this field empty.
- Exclude from XML Sitemap (3): Enable this if you don’t want search engines to index the category page.
By default, categories are included in the sitemap to help with SEO. Only exclude them if necessary (e.g., for internal-only categories).
- Position (4): This controls where the category appears in the category list on your storefront. The lower the number, the higher the position.
- Template (5): define how your posts will be displayed within a category.

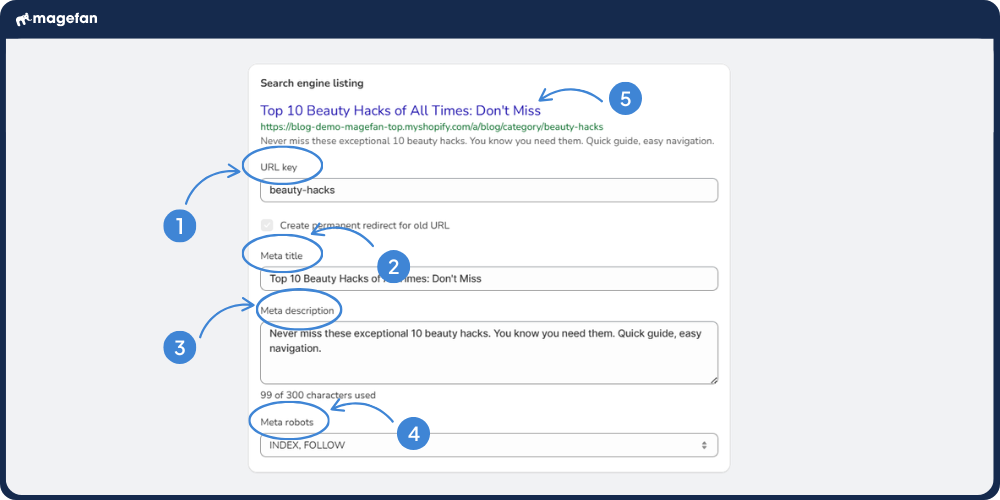
Step 3: Optimise for SEO
Before you publish, scroll down to the SEO section and fill out the following:
- URL Key (1): This becomes part of the URL, so make it lowercase and use dashes instead of spaces. Example: behind-the-scenes
- Meta Title (2): Shown in search engine results. It should match or be similar to your category title, with a keyword or two.
- Meta Description (3): A short summary (around 160 characters) that describes what readers will find in posts under this category.
- Meta Robots (4): change them only when necessary if you want to change how robots crawl and index yoru categories.
Once you finish, preview how your post will appear in search (5).
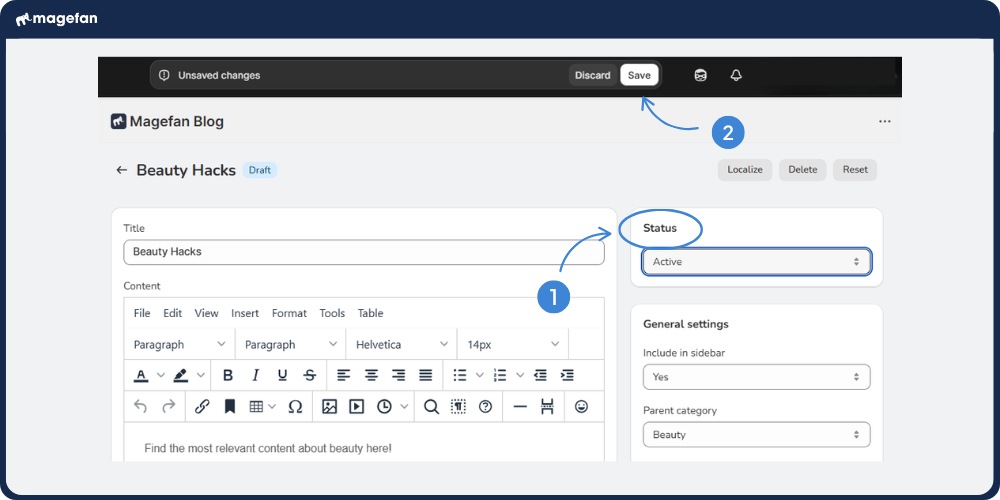
Step 4: Set the Category Status and Publish
Almost done! Choose the category status (1) and hit Save (2) once you’re ready.
- Aclive – live and visible on your blog
- Draft – saved as a draft
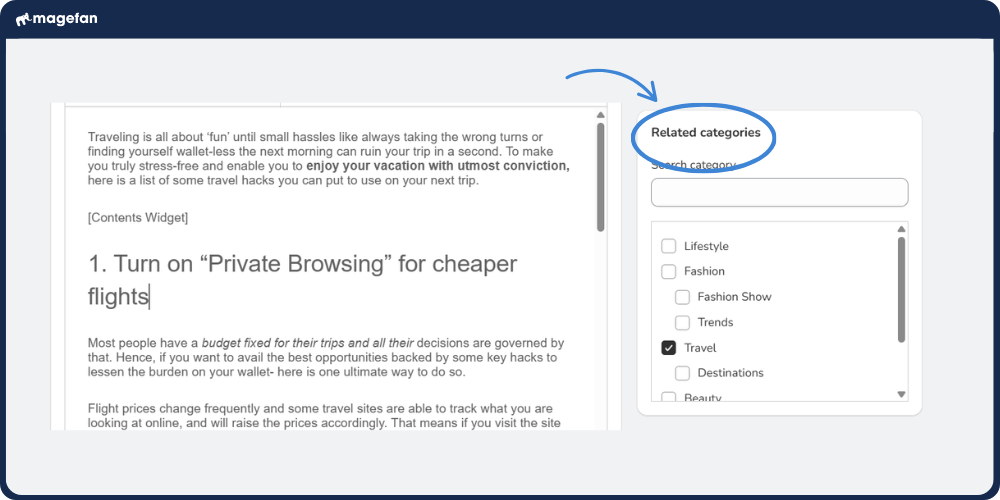
Assign Categories to Posts
Once your categories are created, assigning them to posts is easy.
- Go to Posts → Edit any existing blog post or create a new one
- Scroll to the Categories section under the editor
- Check the boxes for the categories you want this post to appear under
- Save your post
Done. Your blog post is now organized — and connected to other similar content.
Pro Tips for Using Categories Wisely
- Don’t overdo it: 5 – 10 solid categories are often better than 20 scattered ones.
- Be consistent: Assign categories based on post topic, not mood.
- Think SEO: Use keywords in category names and slugs when it makes sense.
- Use parent categories: If you publish a lot, nesting categories keeps things tidy.
Wrap-Up: Structure That Scales
Whether you’re just getting started with your first three blog posts or you’re managing a blog with hundreds of articles, setting up categories from the beginning helps your content scale gracefully.
Blog smarter, not harder.
Have questions or need help with setup? Visit our documentation or reach out to our support team. We’re here to help your content shine.
Start building your blog structure today — your readers (and your future self) will thank you.


