

Turn Ideas Into Impact — One Post at a Time
You don’t have to be a professional writer to start publishing content on your Shopify store. Whether you're sharing product tips, company news, or customer stories — your blog is your voice, and the Magefan Blog App gives you the platform.
This guide will walk you through the process of writing your first blog post. No fluff, no complicated setup — just practical steps to help you publish confidently.
Let’s get into it.
Step 1: Access the Blog App
To get started, log in to your Shopify admin panel. On the left-hand side, click Apps > Magefan Blog.
You’ll now see the Blog Dashboard, which you can use to navigate your blog settings.
Let’s focus on writing your first post. Follow the steps described below or watch this short video.
Step 2: Create a New Blog Post
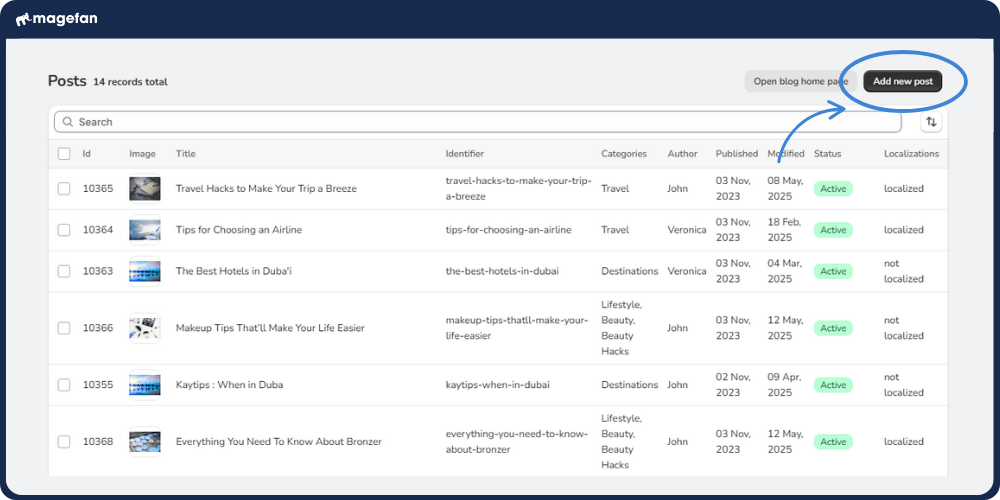
Click on the Posts tab in the Magefan Blog App menu. You’ve already got a few sample blog posts there. Review them and click the "Add New Post" button in the top-right corner to start creating.
This opens the post editor, where you’ll spend most of your time. It’s clean, intuitive, and packed with the tools you need.
Step 3: Add a Title and Content
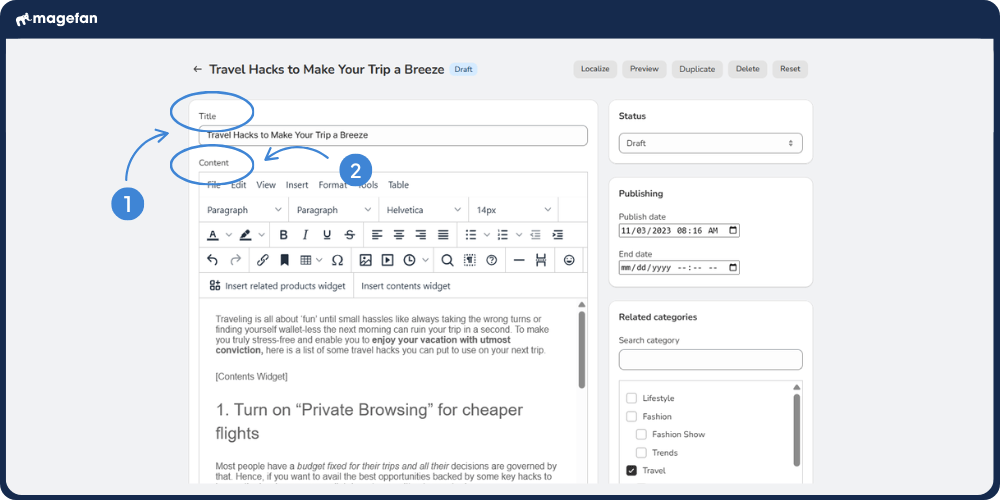
Every blog needs a headline. Add yours in the Title field (1). Then move on to the Content box (2) — this is where the magic happens. Write your post using plain text, or format it using the built-in WYSIWYG editor.
Not sure what to write about? Consider starting with a how-to guide, product spotlight, or answers to common customer questions.
Step 4: Format Your Post
Use the editor toolbar to:
- Add headings (H2, H3, etc.) for structure (1)
- Make text bold, italic, or underlined (2)
- Insert links (3) and bullet points (4)
- Embed post contents (5) or other widgets
A clean structure makes your post easier to read — and easier to rank in search engines.

Step 5: Add Images and Media
Let’s be honest — nobody wants to read a wall of text. Add visuals to make your post pop.
Here’s how:
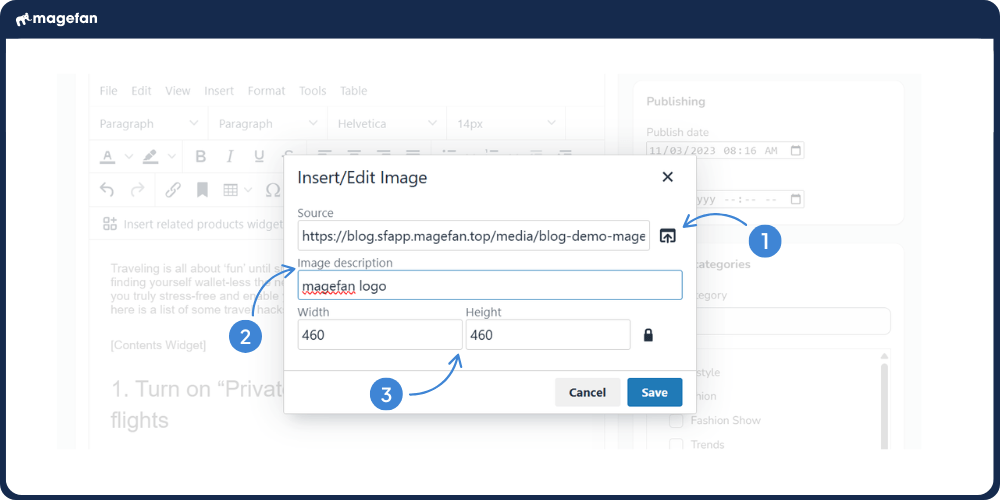
- Click the "Insert Image" icon in the toolbar
- Upload an image or paste an image URL (1)
- Resize and align your image within the post (2)
- Add alt text for accessibility and SEO benefits (3)
Images should support your message — not distract from it.
Step 6: Assign an Author
Scroll down to the Author dropdown and select the name of the person writing the post.
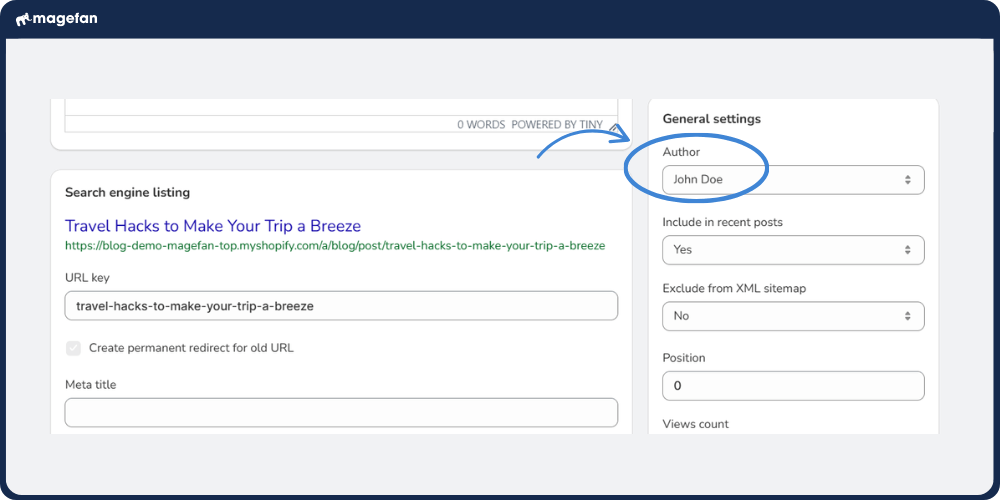
Want to add a new author? Head over to the Authors section in the app menu and click "Add Author". You can include their name, email, and even a short bio.
Step 7: Add Categories and Tags
Categories help organise your content. Click on the Categories and check the box(es) that apply. You can also add new categories if you haven’t created any yet.
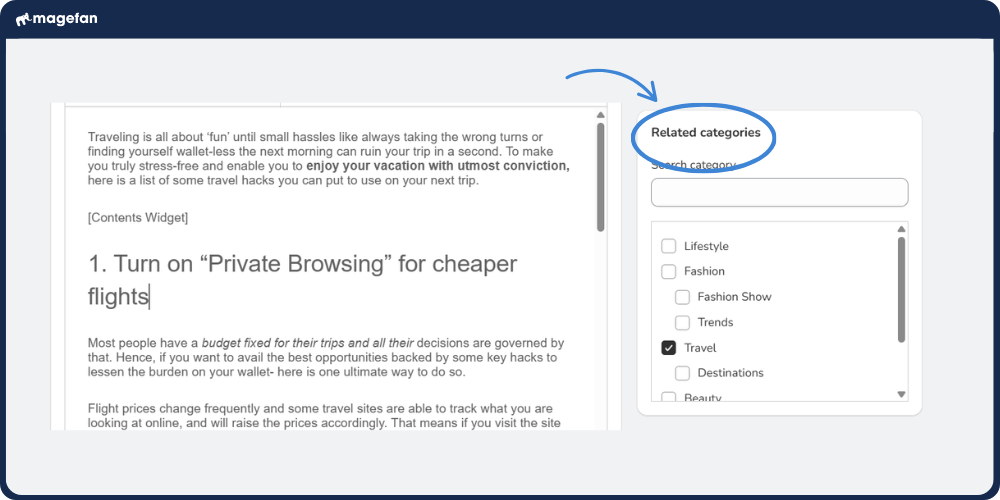
Tags are optional but recommended — they help readers (and search engines) discover related posts.
Step 8: Optimise Your Post for SEO
Before you publish, scroll to the SEO section:
- Customise the URL Key (keep it short and readable) (1)
- Add a Meta Title (what shows in Google search results) (2)
- Write a Meta Description (entices clicks) (3)
- Preview how your post will appear in search (4).
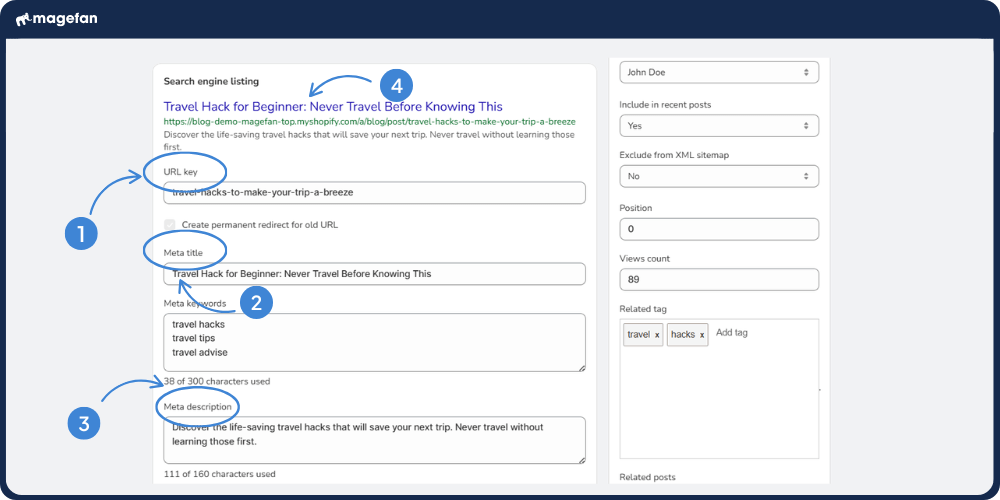
Meta keywords are optional since Google no longer considers them for ranking, but you can still fill them out.
These fields help search engines understand and rank your content, and can improve your click-through rate in search results.
Step 9: Set the Post Status and Publish
Almost done! Choose the post status (1):
- Aclive – live and visible on your blog
- Draft – saved as a draft
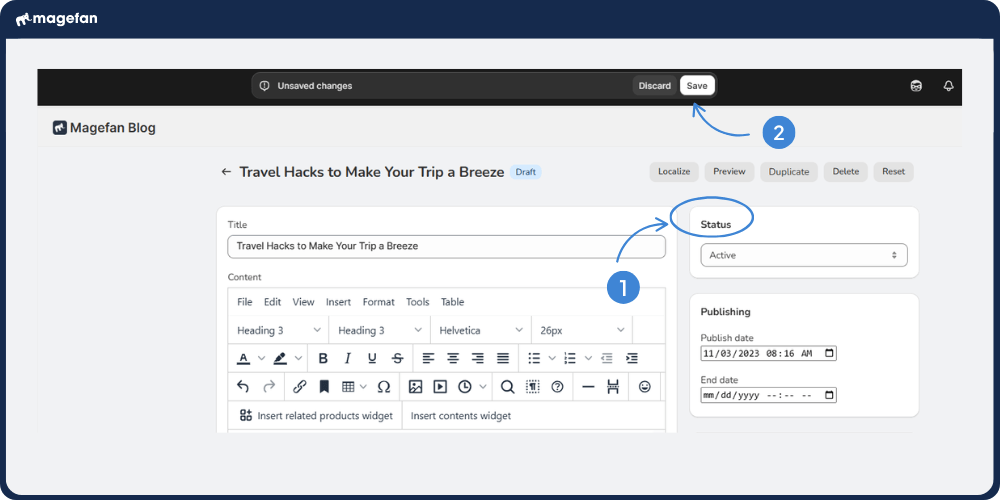
When you’re ready, hit Save (2). Your post will automatically be published on your blog page.
Step 10: Check Your Work
Click the Preview button to preview how your post looks on the front end. Make sure:
- Text displays correctly
- Links work
- Images look sharp
- Formatting is clean
- SEO settings are in place
Tweak anything that needs adjusting — and you’re done!
Ready to Keep Writing?
That’s your first blog post — done. Simple, right?
You’ve just taken a big step in growing your brand’s content presence. And this is just the beginning. The more you write, the more value you create for your customers and your business.
Need more help? Visit our documentation or reach out to our support team. We’re here to back you up, whether it’s your first post or your fiftieth.
Next step? Hit that “Add New Post” button and keep the momentum going.
Your story’s just getting started.


